Tell the Story of Thanksgiving with Native American Arts and Crafts
Explore the story of Thanksgiving from the perspective of the Native American tribes and learn about the Three Sisters with the charming children’s book Keepunumuk: Weeâchumun’s Thanksgiving Story. Read the story with your Kindergarten students then get hands-on with this Three Sisters craft project that can be completed over a series of lessons. Then, using the lesson plan, dive deeper into the Native American culture with activities on the Three Sisters, Corn, Beans, and Squash.
For more craft ideas for Native American Heritage Month or Thanksgiving, learn how to create corn husk dolls, or try this lesson on Keepunumuk to recreate the animals from the story.
What's Included
- Step-by-step Thanksgiving craft instructions
- Lesson plan with accompanying activities
- Printable kids' craft templates
- Printable activity worksheets
Native American Crafts - Look Inside the Lesson
Materials needed:- The book, Keepunumuk: Weeâchumun’s Thanksgiving Story
- For Corn: Cardboard tube, yellow paint, green construction paper, green pom poms, green pipe cleaners, black marker, glue
- For Beans: Green construction paper, green pom poms, green pipe cleaners, black marker, glue
- For Squash: Paper bag, green felt or construction paper, black marker, glue.
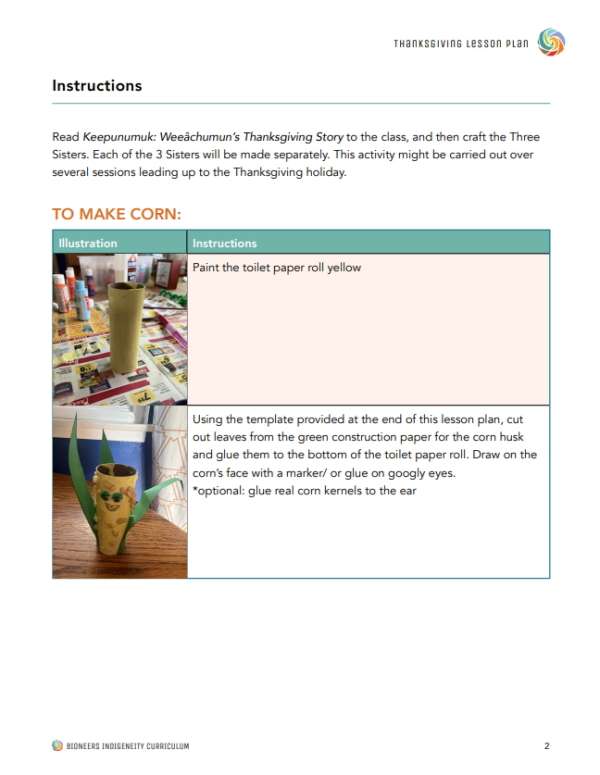
- Paint the toilet paper roll yellow.
- Using the template provided at the end of this lesson plan, cut out leaves from the green construction paper for the corn husk and glue them to the bottom of the toilet paper roll.
- Draw on the corn’s face with a marker/ or glue on googly eyes. *Optional: glue real corn kernels to the ear.
- Using the template, cut the bean pod out of construction paper.
- Glue the ends of the bean and pinch them together to shape the bean pod. Glue green pom-poms to the pod. Leave room to draw a face on the pod.
- Draw a face on the pod with a marker or glue on a mouth and googly eyes. *Optional: Add leaves and green pipe cleaners to make beanstalks.
- If you don’t have orange or yellow paper bags, paint the paper bag the color of squash. You can get creative with details if you like.
- See the example to the left. Fill the paper bag with crumpled-up newspaper (or alternative filler if you prefer). Tie the end of the paper bag with a rubber band.
- Optional: Twist the end of the bag to make a stem and paint it green. Using the template, cut squash leaves and glue them to the bag. Using the black marker, add a face to the squash.
- Optional: glue on googly eyes to make a face, and/or draw ribs on the pumpkin.
Bioneers: Revolution From The Heart Of Nature


