Meteors on Film: Photography Tips
 Capturing a meteor on film is mostly a point, click, and luck proposition. Point the camera where you think they'll be and shoot. With luck you'll get something. And, like fishing, you'll never know if you'll get a bite unless you throw out your line.
What You'll Need
- A 35mm camera with "bulb" or time exposure capability.
- Cable release for opening and closing the shutter.
- Camera tripod.
- Fast film (black and white is best, color is OK).
- A dark sky viewing area clear of ground lights and overhead wires.
- Patience. Lots of it.
Choice of film and exposure length depends on how quickly the film starts to fog due to the light pollution and how dark the sky is. One simple test for sky darkness is to hold your hand at arm's length and look at it against the night sky. If your hand is dark against the sky, you've got a fair amount of light pollution. The less contrast between your hand and the night sky, the better.
The darker the sky, the faster you'll want your film speed to be. ASA/IOA 1000 is recommended for black skies and ASA/IOA 400 for skies with higher ambient light.
What Lens Should I Use?
Telephoto lenses are not recommended because their field of view is too narrow. You'll want to capture as much sky as possible and a 50mm or 28mm lens is ideal for the task.
Getting Ready
Locate your camera on solid ground where you won't bump into it in the darkness.
A few nights (or weeks) prior to shooting you'll want to do a practice run. With the shutter wide open and the camera focused on infinity, try shooting a series of time exposures (1, 2, 3, 4, 5, 6, 7, 8, 9, 10, 15, 20, 25, 30 minutes). On a sheet of paper, note the exposure time of each frame.
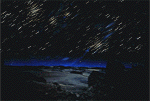
After the film is developed, you'll want to note the maximum time you can keep the shutter open before the sky starts to fog-up and turn gray. The longer your exposure time the longer the star trails will appear. Meteors will appear as straight lines crossing the star trails. So will any passing aircraft or satellites :-(
Dew and Frost
Check your camera lens for condensation (dew or frost) after each shot and wipe the lens dry with a lens cloth. For long takes, Alan MacRobert of Sky & Telescope recommends a cardboard dew shield for your camera lens to minimize exposure to the cold night air.
Dew shields are definitely low tech and can be made easily at home with cardboard and tape. It's simply a cardboard tube attached to the end of your camera. When completed it'll look like you are shooting from the bottom of a well -- just make sure the cardboard doesn't intrude into the field of view when you look through the view finder.


