Cut Out Cards
Materials
- Paper
- Scissors
- Pencil
- Coloring supplies (crayons, markers, colored pencils)
- Optional: Glue, glitter, and other decorative supplies as needed
Procedures
- This is very similar to making paper dolls.
- First students need to pick out a design for their card (driedel, star, tree...).
- Fold a piece of paper in half, long ways.
- Then fold it accordion style.
- Draw an outline of a the design on the top fold so that the top of the design touches the fold on top and the tips of it touch the sides.
- Students cut it out, making sure that they do not cut the ends or top of the design.
- After they cut their design out, carefully unfold it.
- They should have several pieces that are connected at the top so that they can stand up.
- Cut outs should also be connected at the sides.
- Color and decorate each design.
- For a multi-cultural theme, try cutting out paper dolls as described above.
- Decorate each doll in traditional costumes from different countries.
- On the inside, students write a holiday greeting in different languages or holiday traditions (Merry Christmas, Happy Hanukkah, Feliz Navidad…)
Giant Reindeer Card
Materials
- White paper (10 x 12 or larger)
- Tempura paint (brown for the body and other colors for the antlers)
- A tray for each color
- Sponge
- Ready made eyes (small)
- Pom-poms
Procedures
- Fill a tray with brown paint.
- Have students either put the bottom of one foot in the paint or sponge the paint onto the bottom of their foot.
- Place the painted foot on the white paper so that the heel is centered near the bottom of the page. This forms the head of the reindeer.
- Students put a different color of paint on the bottom of their left hand.
- Then have them place the painted hand at an angle, touching the toe on the left side of the footprint. This forms one antler.
- Repeat with the right hand to make the other antler.
- When the paint is dry, have students glue on two eyes and a pom-pom for the nose.
- For more fun: Make other animals or holiday motifs using other painted body parts, like fingertips, the side of the thumb, just the heel, and so on.
Solar Print Cards
Materials
- A sunny day
- Construction paper
- A place to leave cards outside
- One or more objects to put on the paper with a design in mind
Procedures
- Place the construction paper outside in a place that gets sun all day.
- Students arrange their objects on the paper so that they form a pattern or picture.
- Leave cards outside for the day.At the end of the day, remove the objects from the paper to see the design.
- Students write a greeting on the inside!
Stained Glass Cards
Materials
- Construction or other paper
- Scissors
- Pencil
- Hole puncher
- Tissue paper (different colors)
- Glue or scotch tape
- Ribbon or yarn
Procedures
- To make a snowflake:
- Draw a circle and cut it out.
- Fold it in half three times.
- Snip little pieces from the sides.
- Open it up and students have a snowflake.
- To make a tree:
- Cut a piece of paper in half.
- Draw an outline of a pine tree and cut it out.
- Punch a hole at the top of the tree.
- Punch other holes all over the tree.
- For both the snowflake and the tree:
- Cut up small pieces of different colored tissue paper and place them over everything but the top hole.
- Glue or tape in place.
- Put a piece of ribbon or yarn through the top hole and tie so that it forms a loop.
- Write a greeting and send it off to a friend or relative to hang in a sunny window.
Variation: See what other shapes (star, drum, dreidel) your students can turn into stained glass!
Pop-Up Cards
Materials
- Paper
- Scissors
- Pencil
- Coloring supplies (crayons, markers, colored pencils)
- Optional: Glue, glitter, and other decorative supplies as needed
Procedures
- Fold a piece of paper in half or quarters to make a card.
- Decorate and/or write a greeting on the cover.
- Take another piece of paper and fold it in half.
- This needs to be smaller than the card that it is going inside of.
- Cut out a shape, like a person, star, menorah, tree, dreidel, and so on.
- Glue it by its edges across the center of the card.
- Decorate!
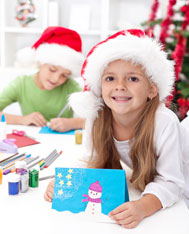
Try these five fun card making ideas this holiday season. Follow the instructions to make a giant reindeer card, cut out cards, stained glass cards, solar print cards, and pop-up cards for Christmas, Kwanzaa, or Hanukkah.
Holidays
Simplified Content Type


